How to Make Ground Beef Jerky: A Step-by-Step Guide
Welcome to this comprehensive how-to guide where we'll be diving into the process of making your very own ground beef jerky using a food dehydrator. Jerky is a popular, protein-rich snack, but it can be quite expensive to buy. Fortunately, making it at home can be economical and allows you to customize the flavors to your liking. This guide will cover everything from selecting the right meat to the final drying process, ensuring you end up with delicious, homemade jerky.
Introduction
Jerky has been a staple snack for centuries, loved for its savory taste and long shelf life. Today, we're going to focus on making ground beef jerky in a dehydrator. We'll go through the process step by step, detailing everything you need from ingredients to equipment. Whether you're a seasoned jerky maker or new to the craft, this guide will help you create a tasty snack in your own kitchen.
Ingredients and Equipment
Ingredients:
2.5 pounds of 90/10 ground beef (lean cut)
1.5 tablespoons of salt
2 tablespoons of Worcestershire sauce
2-3 teaspoons of cayenne pepper (adjust to taste)
Equipment:
8-tray food dehydrator (preferably with stainless steel components)
Jerky press or cookie press with a suitable attachment
Mixing bowl
Plastic wrap
Pizza cutter or knife
Optional: Additional cayenne pepper for sprinkling
Preparing the Meat
Mixing Ingredients: Start by placing your ground beef into a large mixing bowl. Add the salt, Worcestershire sauce, and cayenne pepper. Using your hands or a utensil, thoroughly mix the ingredients until they are evenly distributed throughout the meat.
Using a Jerky Press (optional): If you have a jerky press, load the seasoned meat into it. If you're using a cookie press like our guide Cassie, attach the desired nozzle for the thickness you prefer, and load the press with meat. Test the press to ensure it's extruding the meat correctly. If it doesn't work as expected, you may need to consider an alternative method or a different press.
Shaping the Jerky
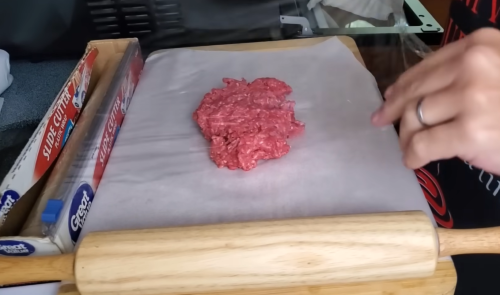
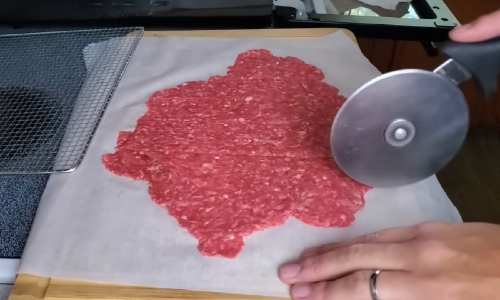
Prepping the Workspace: Lay out a piece of plastic wrap on a flat surface. The plastic wrap should be larger than the dehydrator tray you will be using.
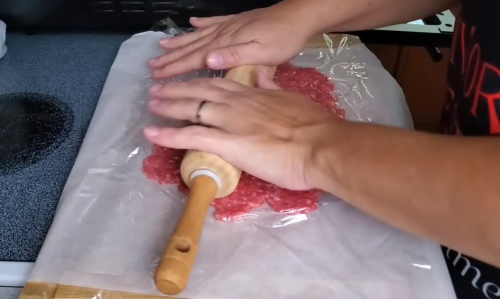
Forming the Jerky: Place a portion of the ground beef mixture onto the plastic wrap and use another sheet of plastic wrap to cover it. Flatten the meat with a rolling pin or your hands until it's about 1/8 inch thick.
Cutting the Jerky: Use a pizza cutter or a knife to cut the flattened meat into strips or desired shapes. Aim for uniformity in size and thickness to ensure even drying.
Arranging the Meat in the Dehydrator
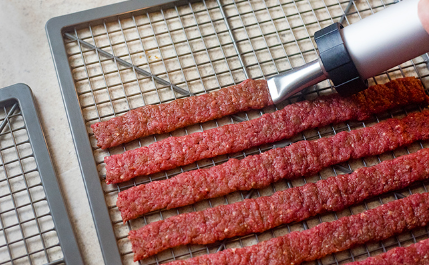
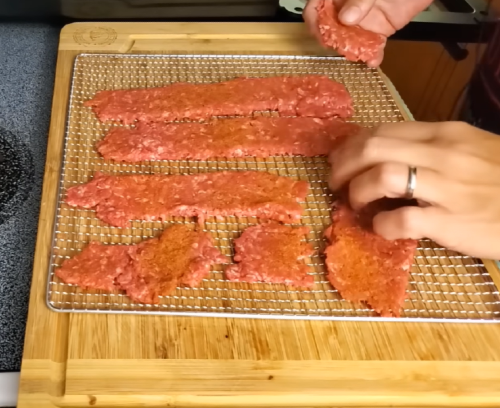
Loading the Trays: Carefully transfer the meat strips onto the dehydrator trays. Make sure the strips do not overlap, as this can hinder airflow and result in uneven drying. If desired, sprinkle additional cayenne pepper on top of the meat for extra heat.
Filling the Dehydrator: Repeat the shaping and cutting process with the remaining meat until all the trays are filled. Aim to distribute the meat evenly across six trays, ensuring the last tray is not overcrowded.
Dehydrating the Jerky
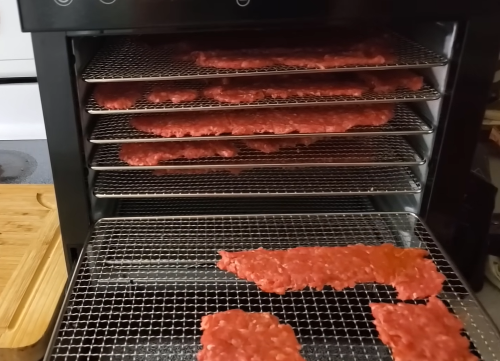
Setting Up the Dehydrator: Place the trays into the dehydrator, ensuring it's assembled according to the manufacturer's instructions. If you're using a dehydrator like the London Sunshine model mentioned, you'll benefit from its design which promotes even air distribution and has stainless steel components.
2 Selecting Time and Temperature: Plug in the dehydrator and set the temperature to 131°F (55°C). Set the timer for 12 hours, although you'll need to check the jerky after about 7 hours to assess its progress.
Checking and Finishing
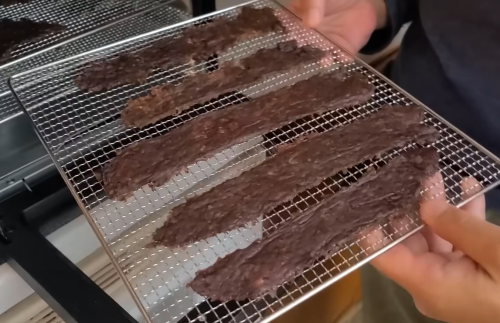
First Check: After about 7 hours, open the dehydrator and inspect the jerky. It should be starting to dry but still pliable. If there's any noticeable grease, you can dab it off with a paper towel.
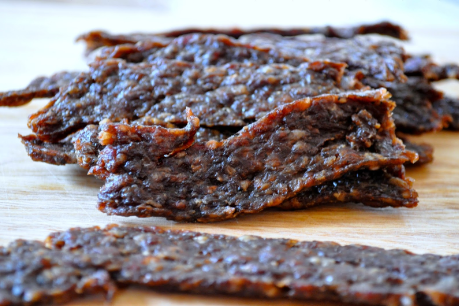
Final Check: Once you reach the 11-hour mark, check the jerky again. It should be dry to the touch and bend without breaking. Taste a piece to ensure it's to your liking. If it's not fully dried, let it continue dehydrating and check periodically.
Cooling and Storage
Cooling Down: After the jerky is finished, turn off the dehydrator and let the jerky sit for about 5 minutes to cool down.
Storage: Once cooled, store the jerky in an airtight container. It can be kept at room temperature for short-term use or refrigerated for longer storage.
Conclusion
Making ground beef jerky at home is a rewarding process that results in a protein-rich and cost-effective snack. With this guide, you've learned how to select ingredients, prepare the meat, and use a dehydrator to create your own jerky. Remember, you can experiment with different flavors and spices to make the recipe your own.