


Grinding your own ground beef at home offers unparalleled control over flavor, quality, and nutritional content. This guide walks you through the entire process, from selecting the right cuts, prepping the meat, to using your grinder effectively.
Grinding your own ground beef allows for greater control over the fat content and quality of your meat, ensuring a fresher and potentially healthier product than you might find pre-packaged at the store. This guide, based on a video by Butcher Wizard, will walk you through the process of grinding beef at home, including selecting your cuts, determining fat content, and the grinding process itself.
Grinding beef at home is a simple process that can be tailored to your specific taste and dietary preferences. Whether you prefer a fatty ratio like 75/25 (75% lean meat to 25% fat) for juicier burgers, or a leaner mix like 96/4 for a healthier option, you can achieve it by following these steps. Additionally, you can utilize trimmings from other butchering projects to enhance the flavor and quality of your ground beef.
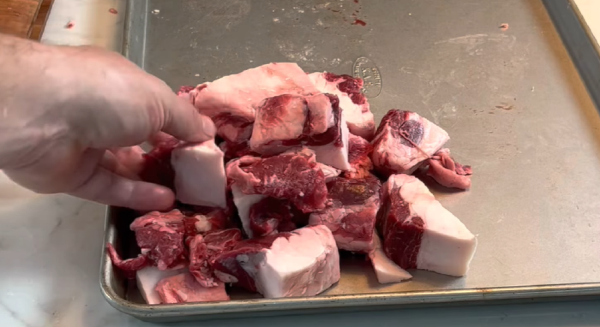
Begin with selecting your cuts of beef. You can use scraps from different projects such as ribeye trim, end cuts, chuck, or even brisket fat. Ensure that the meat is fully defrosted if it was previously frozen to facilitate easy cutting and grinding.
Cut the meat into pieces that will fit comfortably down the chute of your grinder. One-inch pieces are typically sufficient. Ensure that the pieces are of even size to promote uniform grinding. If you're planning to grind various cuts, consider dedicating a day to this task and doing it all at once to stock your freezer efficiently.
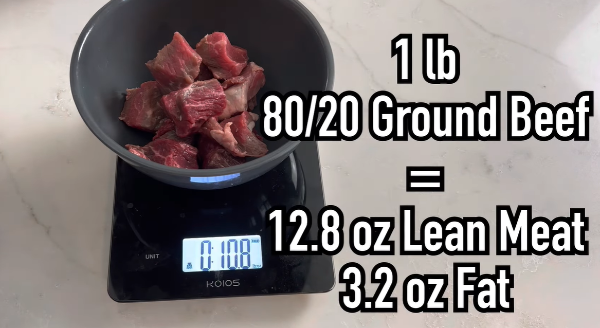
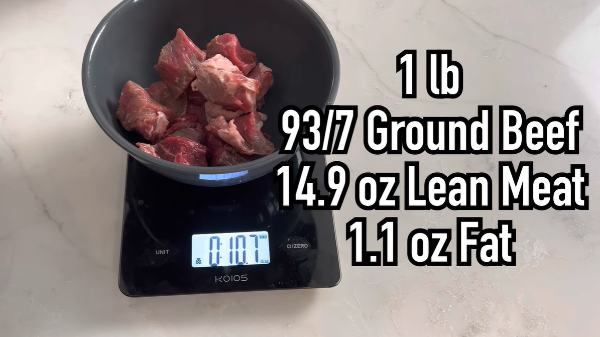
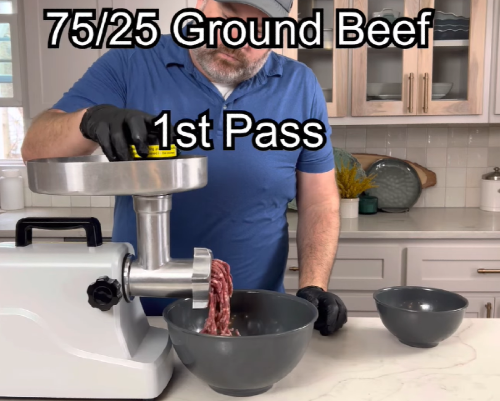
Weigh out your lean meat and fat to achieve the desired ratios for your ground beef. For example, for 75/25 ground beef, you'd ensure that 25% of the weight is fat and the rest is lean meat.

Place the meat on a tray in a single layer and freeze it for about 15-20 minutes to ensure that it's very cold but not fully frozen. This helps to keep the fat from smearing and maintains a good texture. Also, place the grinder attachment, blade, die, and any other metal parts in the freezer. This step is crucial as a cold environment ensures better grinding results.
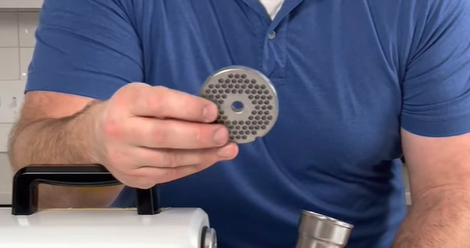
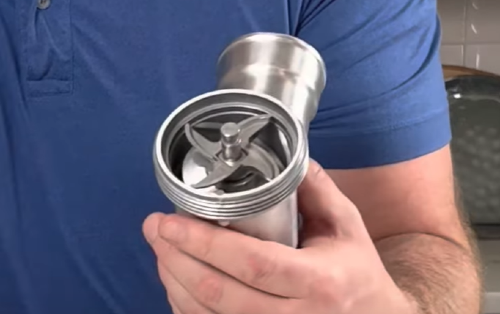
Familiarize yourself with the parts of your meat grinder:
- Die: The plate with holes that determine the coarseness of the grind.
- Blade: The sharp component that cuts the meat as it's pressed through the die.
- Auger: The spiraled shaft that feeds the meat from the hopper to the blade and die.
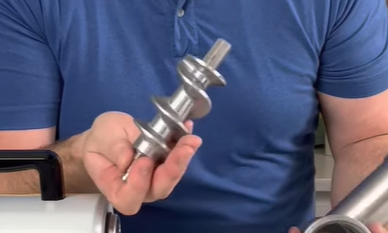
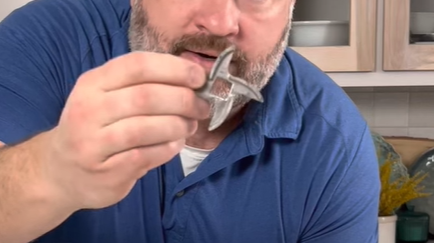
Ensure the blade is correctly installed with the flat side facing outwards to lie almost flush against the die. This alignment is essential to prevent the meat from becoming mushy. Attach the blade and die to the auger, and then secure the assembled auger into the grinder.
Once the meat and equipment are chilled, begin with your first grind. Feed the meat into the hopper without overfilling it, as this can lead to overworking the meat. Grind the meat into a bowl set in ice to keep it cold.
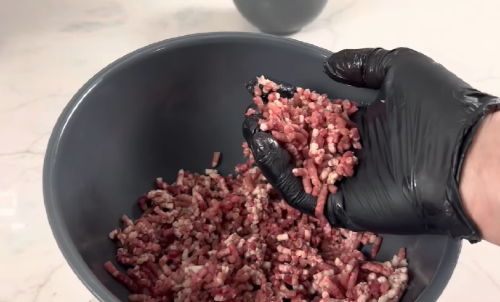
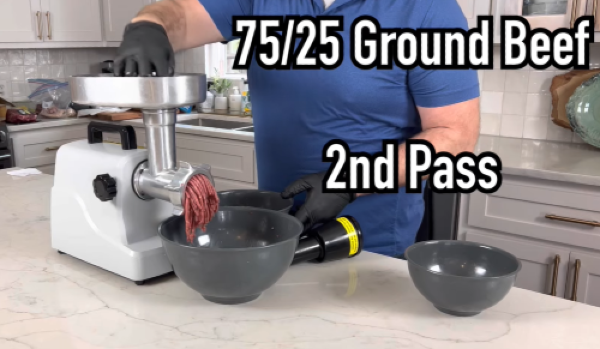
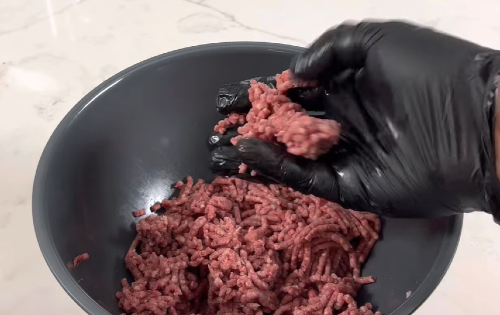
After the initial grind, the meat will still appear somewhat coarse. Run the meat through the grinder a second time for a finer texture, which is closer to what you may find at a grocery store.
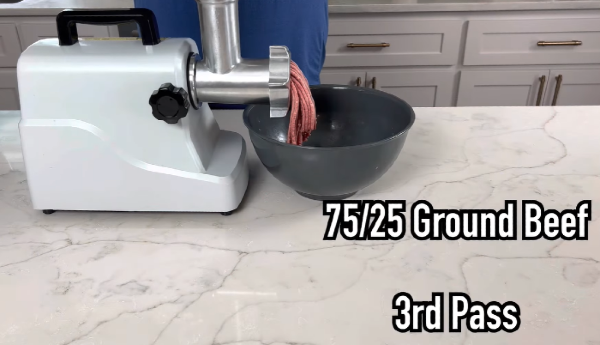
For an even smoother texture, especially for recipes like burgers, pass the meat through the grinder a third time. Adjust the number of times you grind based on the texture you desire for your final product.
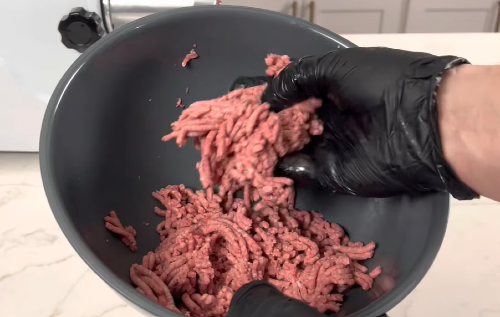
Once ground to your satisfaction, you can shape the beef into patties, store it in bulk, or use it immediately in your recipes. For storage, wrap the ground beef tightly in plastic wrap or vacuum seal it, and freeze it if you're not using it right away.
Disassemble the grinder and clean all parts thoroughly with hot soapy water. Make sure to remove any meat residue, as this can lead to bacteria growth.
Congratulations! You've now learned how to grind your own beef at home to your preferred fat-to-lean ratio. Enjoy the fresher taste and satisfaction of having full control over the quality and content of your ground beef. Remember, practice makes perfect, so don't hesitate to experiment with different cuts and ratios to find your perfect grind.


